IPTV Tutorial
Our subscription supports all devices.
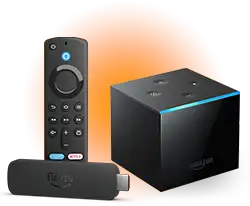
FireStick
TiviMate
Enable Installation from Unknown Sources:
– Go to the Settings menu on your Firestick.
– Select My Fire TV or Device.
– Select Developer Options.
– Enable Apps from Unknown Sources.
– Install IPTVSMARTERS PRO using the downloader app:
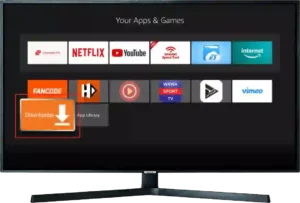
– Launch the download application.
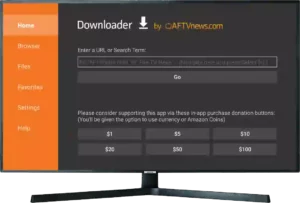
– In the URL field, enter 943714 where the TiviMate APK file can be downloaded. Make sure it is a trusted source.
– Download the TiviMate APK file.
– Once the download is complete, you will be asked to install the APK. Select “Install”.
– After installation, you can open TiviMate from your Apps section on Firestick.
IBO Player Pro
Enable installation from unknown sources:
– Go to the Settings menu on your Firestick.
– Select My Fire TV or Device.
– Select Developer Options.
– Enable apps from unknown sources.
– Install IboPlayer PRO using the Downloader app:

Launch the downloader application.

– In the URL field, enter 947786 where the iboplayer PRO APK file can be downloaded. Make sure it is a trusted source.
– Download the iboplayer PRO APK file.
– Once the download is complete, you will be asked to install the APK. Select “Install”.
– After installation, you can open iboplayer from your apps section on Firestick.
– Launch the iboplayer app on your Android TV to get the device ID and key.
– Send us your device ID and key.
IBO Player
Enable installation from unknown sources:
– Go to the Settings menu on your Firestick.
– Select My Fire TV or a device.
– Select Developer options.
– Enable apps from unknown sources.
Install iboplayer using the Downloader app:

– Launch the download application.

– In the URL field, enter 511693 where the iboplayer APK file can be downloaded. Make sure it is a trusted source.
– Download the iboplayer APK file.
– Once the download is complete, you will be asked to install the APK. Select “Install”.
– After installation, you can open iboplayer from your apps section on Firestick.
– Launch the iboplayer app on your Android TV to get the device ID and key.
– Send us your device ID and key.
IPTVSmarters Pro
Enable installation from unknown sources:
– Go to the Settings menu on your Firestick.
– Select My Fire TV or a device.
– Select Developer options.
– Enable apps from unknown sources.
– Install IPTVSMARTERS PRO using the downloader app:

– Launch the download application.

-In the URL field, enter 820194 where the IPTVSMARTERS PRO APK file can be downloaded. Make sure it is a reliable source.
– Download the IPTVSMARTERS PRO APK file.
– Once the download is complete, you will be asked to install the APK. Select “Install”.
– After installation, you can open IPTVSMARTERS PRO from your Apps section on Firestick.

Apple TV
iPlayTV
– Open the App Store on your Apple.
– Tap the search icon and type iPlayTV.
– Select the app from the search results and tap Download to install it.
– After installing the app, tap Open to launch it.
– Contact iptv-belgique.store support for subscription login information.
– After launching iPlayTV, enter your m3u subscription.
– Restart the device and launch iPlayTV.
HOT Player
– Open the App Store on your Apple.
– Tap the search icon and type HotPlayer.
– Select the app from the search results and tap to
– Install on demand.
– After installing the app, tap Open to launch it.
– After starting HOTPlayer, the app will display a device ID.
– Send us your device ID to activate your account.
IBO Player Pro
– Open the App Store on your Apple.
– Tap the search icon and type IBOPlayer PRO.
– Select the app from the search results and tap Go to – Install.
– After installing the app, tap Open to launch it.
– After starting IBOPlayer PRO, the app will display a device ID and key.
– Send us your device ID and key to activate your account.

Samsung TV
Hot Player
– Turn on your Samsung TV and make sure it is connected to the internet.
– From the main menu, navigate to Samsung Smart Hub.
– Use the search function to find HotPlayer.
– Select HotPlayer from the search results and press Install.
– After installation, open the app from your app list.
– Send the MAC address to the faartv team via Whatsapp or Telegram or support email.
IBO Player Pro
– Go to the Smart Hub or Apps section on your Samsung Smart TV.
– Use the search function in the Samsung App Store to search for IboPlayer PRO. Type the app name in the search bar.
– Once you find IboPlayer PRO in the search results, select it and you should see an option to download or install the app.
– Launch the IboPlayer PRO app on your Android TV to get the Device ID and Key.
– Send your Device ID and Key to us.
IBO Player
1. On your Samsung Smart TV, go to the Smart Hub or Apps section. 2. Use the search function in the Samsung App Store to search for ibo player. Type the app name into the search bar. 3. Once you find ibo player in the search results, select it and you should see an option to download or install the app. 4. Launch the ibo Player app on your Android TV to get the Device ID and Key. 5. Send your Device ID and Key to us.
IPTVSmarters Pro
– On your Samsung Smart TV, go to the Smart Hub or Apps section.
– Use the search function in the Samsung App Store to search for IPTVSMARTERS PRO. Type the app name in the search bar.
– Once you find IPTVSMARTERS PRO in the search results, select it and you should see an option to download or install the app.
– Launch the IPTVSMARTERS PRO app.

LG TV
Hot Player
– Turn on your LG TV and connect to the internet.
– Go to the LG Content Store by pressing the Home button and navigating to the app.
– Type “HotPlayer” in the search bar and select it from the search results.
– Click “Install” to download and install the app.
– After installation, open “HotPlayer” from your app list.
– Go to the app settings and find your MAC address.
– Send the MAC address to the FaarTV team via Whatsapp or Telegram or support email.
IBO Player Pro
– Go to the Smart Hub or Apps section on your Samsung Smart TV.
– Use the search function in the Samsung App Store to search for IboPlayer PRO. Type the app name in the search bar.
– Once you find IboPlayer PRO in the search results, select it and you should see an option to download or install the app.
– Launch the IboPlayer PRO app on your Android TV to get the Device ID and Key.
– Send your Device ID and Key to us.
IBO Player
1. On your LG Smart TV, navigate to LG Content Store from the home screen or menu. 2. Use the search function in LG Content Store to find “IBO PLAYER”. You can either type in the name or use the link provided: IBO PLAYER – LG Content Store 3. Once you find IBO PLAYER, select it to view details. 4. Click on the “Install” or “Download” option to start the installation process. 5. Launch the iboplayer app on your Android TV to get the Device ID and Key. 6. Send your Device ID and Key to us.
IPTVSmarters Pro
– On your LG Smart TV, navigate to LG Content Store from the home screen or menu.
– Use the search function in LG Content Store to find “IPTVSMARTERS PRO”. You can either type in the name or use the link provided: IPTVSMARTERS PRO – LG Content Store
Once you find IPTVSMARTERS PRO, select it to view details.
– Click on the “Install” or “Download” option to start the installation process.
– Launch IPTVSMARTERS PRO.

Roku
Hot Player
– Go to your Roku home screen and navigate to the Roku Channel Store.
– Use the search bar and type in “Hot Player PRO” or visit the following link directly: Hot Player
– Select Hot Player from the search results and click Add Channel.
– The app will now be added to your Roku home screen.
– Once installed, open the Hot Player app from your Roku home screen.
– When you launch the app, you will see a Device ID.
– Send us your Device ID to activate your IPTV service.
IBO Player Pro
– Go to your Roku home screen and navigate to the Roku Channel Store.
– Use the search bar and type in “IBOPlayer PRO” or visit the following link directly: IBOPlayer PRO
– Select IBOPlayer PRO from the search results and click Add Channel.
– The app will now be added to your Roku home screen.
– Once installed, open the IBOPlayer PRO app from your Roku home screen.
– When you launch the app, you will see a Device ID and Key.
– Send us your Device ID and Key to activate your IPTV service.
IBO Player
– Go to your Roku home screen and navigate to the Roku Channel Store. – Use the search bar and type in “IBOPlayer” or directly visit the following link: IBOPlayer – Select IBOPlayer from the search results and click Add Channel. – The app will now be added to your Roku home screen. – Once installed, open the IBOPlayer app from your Roku home screen. – When you launch the app, you will see a Device ID and Key. – Send us your Device ID and Key to activate your IPTV service.

Chromecast
IPTVSmarters Pro
1- Install IPTV Smarters Pro on your device:
For Android devices:
– Open the Google Play Store.
– Search for “IPTV Smarters Pro”.
– Tap “Install” to download and install the app.
For iOS devices:
– Open the App Store.
– Search for “IPTV Smarters Pro”.
– Tap “Get” to download and install the app.
2- Set up IPTV Smarters Pro:
– Launch the app on your device.
– Log in using the credentials provided by your IPTV service provider.
– Configure your playlist by entering the M3U URL or using the Xtream Codes API provided by your IPTV service.
3- Cast content to Chromecast:
– Make sure your Chromecast device is connected to your TV and your mobile device and Chromecast are on the same Wi-Fi network.
– Open IPTV Smarters Pro and start playing the content you want to watch.
– Tap the Cast icon (usually in the top right corner of the app).
– Select your Chromecast device from the list.
– The content should now be streaming to your TV via Chromecast.

iPhone
Hot Player
– Open the App Store on your iPhone.
– Tap the search icon and type HotPlayer.
– Select the app from the search results and tap Get to
install.
– After installing the app, tap Open to launch it.
– After launching HOTPlayer, the app will show a device ID.
– Send us your device ID to activate your account.
IBO Player Pro
– Open the App Store on your iPhone.
– Tap the search icon and enter IBOPlayer PRO.
– Select the app from the search results and tap Get to install.
– After installing the app, tap Open to launch it.
– After launching IBOPlayer PRO, the app will display a Device ID and Key.
– Send us your Device ID and Key to activate your account.
IBO Player
– Open the App Store on your iPhone.
– Tap the search icon and type IBOPlayer.
– Select the app from the search results and tap Get to
install.
– After installing the app, tap Open to launch it.
– After launching IBOPlayer, the app will display a Device ID and Key.
– Send us your Device ID and Key to activate your account.
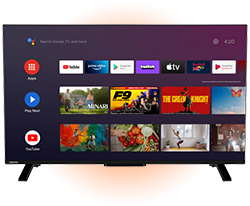
Android TV
Sony, Philips, TCL, Hisense, Sharp, Nokia, Skyworth, Mi TV, Panasonic, JVC
TiviMate
– On your Android TV, go to the home screen and click on Apps.
– Open the Google Play Store and click on the search icon.
– Type TiviMate in the search bar and find the app.
– Select the app from the suggested result.
– Click Install to install the app on your Android TV.
– Once the app is installed, click Open to launch the app.
– Launch the TiviMate app on your Android TV.
Hot Player
– Turn on your Android TV and make sure it is connected to WiFi.
– Open the Google Play Store.
– Type “HotPlayer” in the search bar.
– Select the app and click “Install”.
– After installation, open “HotPlayer” from your app list.
– Go to the app settings and find your MAC address.
– Send the MAC address to the FaarTV team via Whatsapp or Telegram or support email.
IBO Player Pro
– On your Android TV, go to the home screen and click on Apps
– Open Google Play Store and click on the search icon.
– Type IboPlayer PRO in the search bar and find the app.
– Select the app from the suggested result.
– Click Install to install the app on your Android TV.
– Once the app is installed, click Open to launch the app.
– Launch the IboPlayer PRO app on your Android TV to get the Device ID and Key.
– Send your Device ID and Key to us.
IBO Player
– On your Android TV, go to the home screen and click on Apps – Open Google Play Store and click on the search icon – Type IBO Player in the search bar and find the app – Select the app from the suggested result – Click Install to install the app on your Android TV – Once the app is installed, click Open to launch the app – Launch the IBO Player app on your Android TV to get the Device ID and Key – Send your Device ID and Key to us.
IPTVSmarters Pro
– On your Android TV, go to the home screen and click on Apps – Open Google Play Store and click on the search icon – Type IPTVSMARTERS PRO in the search bar and find the app – Select the app from the suggested result – Click Install to install the app on your Android TV – Once the app is installed, click Open to launch the app – Launch the IPTVSMARTERS PRO app on your Android TV.

MAG
Portal URL
1. Connect your MAG device to the Internet:
– Wired connection: Connect the MAG Box to your router using an Ethernet cable.
– Wireless connection (if supported): Navigate to Settings > System Settings > Network > Wireless (Wi-Fi). Select your Wi-Fi network and enter the password.
2. Find the MAC address of your device:
– The MAC address can usually be found on a sticker on the bottom of the MAG device.
– It usually starts with 00:1A:79.
– Provide this MAC address to your IPTV service provider for activation.
3. Configure the portal URL:
– On the MAG device, go to Settings > System Settings > Server > Portals.
– In the “Portal 1 Name” field, enter a name for the portal (e.g. “FaarTV”).
– In the “Portal 1 URL” field, enter the portal URL provided by FaarTV (e.g. “http://faartv.com:8080/c/”).
– Leave the fields for Portal 2 blank unless you need to configure a second portal.
– Save the settings.
4. Restart the portal:
– Return to the system settings and select “Restart portal”.
– The device will reboot and load the IPTV portal.
5. Access IPTV content:
– After the portal has loaded, you should have access to the IPTV channels and content that your subscription provides.

Windows PC
Hot Player
– Go to this link in your browser: Hot Player Windows.
– Allow the download from Microsoft Store.
– Once the download is complete, open the app by double-clicking it.
– Once installed, open the app.
– When you launch the app, you will see a device ID.
– Send your device ID to the support team for activation.
– Restart the app and stream IPTV content on your Windows PC once your account is activated.
IBO Player Pro
– Go to this link in your browser: IBOPlayer PRO Windows.
– The download should start automatically.
– Once the download is complete, locate the installation file in your Downloads folder and double-click to open it.
– Follow the installation instructions to install IBOPlayer PRO on your Windows PC.
– After installation, open the app.
– When you first start the app, it will display a device ID and key.
– Send your device ID and key to the support team for activation.
– Once your account is activated, restart the app and start streaming IPTV content on your Windows PC.

Hisense TV
HotIPTV
– Turn on your VIDAA U3+ TV and connect to the internet.
– Open the VIDAA App Store from the main menu.
– Use the search bar to find HotIPTV.
– Select the app and click Install.
– After installation, open the app from your app list.
– Go to the app settings to find your MAC address.
– Send the MAC address to the FaarTV team via Whatsapp Telegram or Whatsapp.
Vu Player Pro
Access the VIDAA App Store: – Press the Home button on your remote control to open the main menu. – Navigate to the App Store or VIDAA Store icon and select it. Search for Vu Player Pro: – Use the search function in the App Store to search for Vu Player Pro. – When the app appears in the search results, select it. Install the app: – Click the Install button to download and install Vu Player Pro on your TV. Launch Vu Player Pro: – Once installed, the app will be available in your list of installed apps. – Open Vu Player Pro and follow the on-screen instructions to set it up.
SmartOne
Access the VIDAA App Store:
– Press the Home button on your remote control to open the main menu.
– Navigate to the App Store or VIDAA Store icon and select it.
Search for SmartOne:
– Use the search function in the App Store to search for SmartOne.
– When the app appears in the search results, select it.
Install the app:
– Click the Install button to download and install SmartOne on your TV.
Launch SmartOne:
– Once installed, the app will be available in your list of installed apps.
– Open SmartOne and follow the on-screen instructions to set it up.
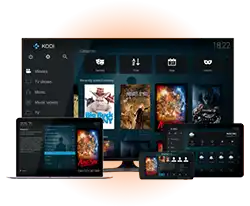
KODI
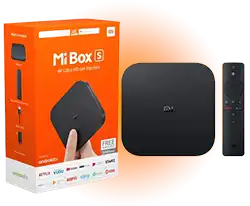
Xiaomi Mi
TiviMate
– On your Xiaomi Mi, go to the home screen and click on Apps.
– Open Google Play Store and click on the search icon.
– Type TiviMate in the search bar and find the app.
– Select the app from the suggested result.
– Click Install to install the app on your Xiaomi Mi.
– Once the app is installed, click Open to launch the app.
– Launch the TiviMate app on your Xiaomi Mi.
Hot Player
– Turn on your Xiaomi Mi and make sure it is connected to WiFi.
– Open the Google Play Store.
– Type “HotPlayer” in the search bar.
– Select the app and click “Install”.
– After installation, open “HotPlayer” from your app list.
– Go to the app settings and find your MAC address.
– Send the MAC address to the FaarTV team via Whatsapp or Telegram or support email.
IBO Player Pro
– On your Xiaomi Mi, go to the home screen and click on Apps
– Open Google Play Store and click on the search icon.
– Type IboPlayer PRO in the search bar and find the app.
– Select the app from the suggested result.
– Click Install to install the app on your Xiaomi Mi.
– Once the app is installed, click Open to launch the app.
– Launch the IboPlayer PRO app on your Xiaomi Mi to get the Device ID and Key.
– Send your Device ID and Key to us.
IBO Player
– On your Xiaomi Mi, go to the home screen and click on Apps
– Open Google Play Store and click on the search icon.
– Type IBO Player in the search bar and find the app.
– Select the app from the suggested result.
– Click Install to install the app on your Xiaomi Mi.
– Once the app is installed, click Open to launch the app.
– Launch the IBO Player app on your Xiaomi Mi to get the Device ID and Key.
– Send your Device ID and Key to us.
IPTVSmarters Pro
– On your Xiaomi Mi, go to the home screen and click on Apps
– Open the Google Play Store and click on the search icon.
– Type IPTVSMARTERS PRO in the search bar and find the app.
– Select the app from the suggested result.
– Click Install to install the app on your Xiaomi Mi.
– Once the app is installed, click Open to launch the app.
– Launch the IPTVSMARTERS PRO app on your Xiaomi Mi.

Enigma2
XStreamity Plugin
Step 1: Install the XStreamity Plugin
– Download the xstreamity_4.61.ipk file to your computer by clicking on the link provided: https://drive.faartv.com/xstreamity_4.61.ipk
– Connect to your Enigma2 device using an FTP client such as FileZilla.
– Use the IP address of your device and log in using the default credentials (username is usually root, and there may or may not be a password).
– Transfer the downloaded .ipk file to the /tmp directory on your Enigma2 device.
– Access the terminal on your Enigma2 device. You can do this using an SSH or Telnet client such as PuTTY.
– Connect to your device using the IP address and log in using the same credentials as you would use for FTP.
“opkg install /tmp/xstreamity_4.61.ipk”
– Wait until the installation is complete.
Step 2: Open XStreamity and add your IPTV subscription
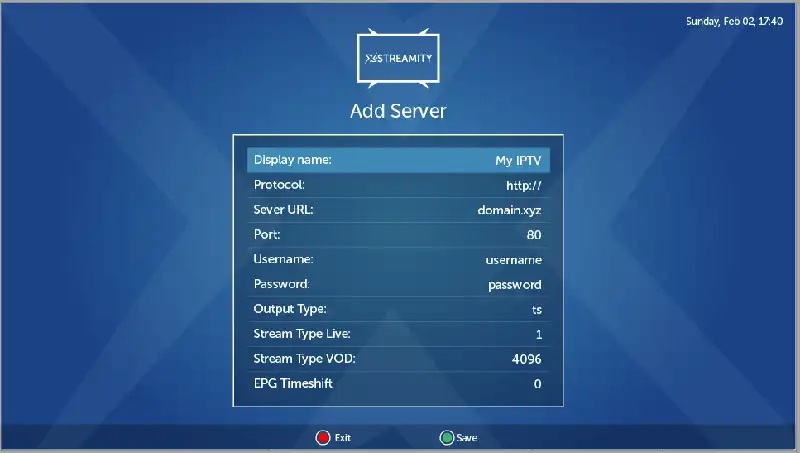
– Go to “Plugins” in the main menu and select “XStreamity”.
– Open XStreamity and go to “Add Playlist”.
– You will need the username, password and server URL you received from your IPTV service.
– Enter each detail in the corresponding field in XStreamity.
Step 3: Load and customize your playlist
– After entering the details, XStreamity will load the IPTV playlist.
– You will see different categories like “Live TV”, “Movies”, “Series” and “Catch up”.
– Go to the settings section in XStreamity and enter the EPG URL.
Step 4: Access IPTV content
– Once your playlist is set up, navigate through the categories and start streaming Live TV, Movies or Series.
– VOD content like Movies and Series can be accessed separately in the XStreamity menu.
XtreamTV Plugin
Step 1: Download and extract XtreamTV plugin
Download the XtreamTV ZIP file from the link provided: https://drive.faartv.com/XtreamTV.zip
Extract the contents of the ZIP file on your computer. Inside you should find a DEB file which is the installation package for the XtreamTV plugin.
Step 2: Connect to your Enigma2 device
Find the IP address of your Enigma2 device by going to Menu > Information > Network on the device.
Connect via FTP: Use an FTP client (e.g. FileZilla) and enter the device’s IP address, username (usually root) and password (if any) to log in.
Step 3: Transfer the XtreamTV DEB file to your Enigma2 device
In your FTP client, navigate to the /tmp directory on your Enigma2 device.
Upload the extracted DEB file from your computer to the /tmp directory.
Step 4: Install the XtreamTV plugin using Telnet or SSH
Open a terminal or use an SSH client (e.g. PuTTY) to connect to your Enigma2 device. Use the IP address, root username and password (if set).
Run the following command to install the XtreamTV plugin:
dpkg –force-all -i /tmp/XtreamTV_0.2.3_oe26_aarch64.deb
Wait for the installation to complete. This command will install the XtreamTV plugin and force the installation to overwrite any conflicting files if necessary.
Step 5: Configure the XtreamTV plugin
After installation, reboot your Enigma2 device to ensure the plugin is fully activated.
After rebooting, open the XtreamTV plugin from the plugin menu on your Enigma2 device.
A plugin ID (MAC address) will be displayed on the screen. Make a note of this ID as it is needed for IPTV activation.
Step 6: Register the plugin ID with FaarTV
Provide the plugin ID to FaarTV support so they can activate your subscription.
Step 7: Access IPTV channels
Once FaarTV has confirmed activation, reboot your device if necessary.
Open XtreamTV again and you should see the IPTV channels and VOD options according to your subscription.
Stalker Plugin
Step 1: Download the Stalker Plugin file
Download the Stalker.ipk file from the link provided: https://drive.faartv.com/Stalker.ipk
Save the file to your computer for easy access.
Step 2: Transfer the Stalker Plugin to your Enigma2 device
Connect to Enigma2 via FTP:
Use an FTP client such as FileZilla and enter the IP address, username (usually root) and password (if any) of your Enigma2 device.
Browse to the /tmp directory:
On the Enigma2 device, go to the /tmp directory.
Upload Stalker.ipk:
Transfer the Stalker.ipk file from your computer to the /tmp folder on your Enigma2 device.
Step 3: Install the Stalker Plugin using Telnet or SSH
Open a terminal or SSH client:
Use a terminal or Telnet/SSH client (like PuTTY) to connect to your Enigma2 device.
Install the plugin:
Run the following command to install the .ipk file:
opkg install /tmp/Stalker.ipk
Wait for the installation: The Stalker plugin will be installed on your Enigma2 device.
Step 4: Restart the device
After the installation is complete, reboot your Enigma2 device:
Restart
Step 5: Configure the Stalker plugin
Open the Stalker plugin:
After the device reboots, navigate to Plugins and select Stalker.
Enter portal information:
You need to enter the portal URL provided by FaarTV. This URL is required to connect to the IPTV server.
Also, enter any usernames and passwords provided by FaarTV if required.
Step 6: Save and connect
After entering the portal information, save the settings.
The Stalker plugin should now connect to the IPTV portal, allowing you to access live TV channels, VOD and other IPTV features depending on your subscription.
Step 7: Test the connection
Go back to the Stalker main screen and test if the channels have loaded successfully.
If everything is set up correctly, you should now have access to your IPTV content.
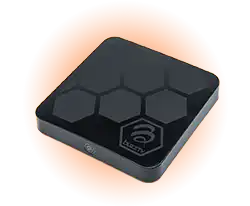
BuzzTV
Portal URL
Step 1: Access Settings on BuzzTV
From the main BuzzTV screen, navigate to the Settings option.
Click Settings to enter the configuration menu.
Step 2: Open Server Settings
From the Settings menu, select Servers.
This will take you to the Server Settings screen where you can add or configure your IPTV server.
Step 3: Add a new server
From the Server Settings menu, you will see several server slots.
Select an empty server slot (e.g. Server 1) to add a new IPTV server.
Step 4: Enter IPTV details
From the Server Configuration screen, enter the following information provided by FaarTV:
MAC Address:
This is the MAC address of your device. It may already be entered or visible on the screen. Provide this MAC address to FaarTV support as they will need it for activation.
Server name:
Enter a name for this server (e.g. “FaarTV” or any other name you like).
Server URL:
Enter the portal URL you received from your IPTV provider.
Note: If it is a MAC based portal, add /c at the end of the URL (e.g. http://example.com:8080/c).
Step 5: Connect
After entering all the required information, click “Connect” to save the settings and connect to the IPTV server.
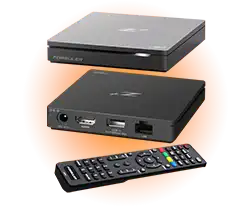
Formuler Z
MYTVOnline
Step 1: Open the MYTVOnline app
Turn on your Formuler Z Series device.
Open the MYTVOnline app from the main menu. If you don’t have MYTVOnline, you may need to install it from the Formuler App Store or, on newer devices, use MYTVOnline 2.
Step 2: Add a new portal
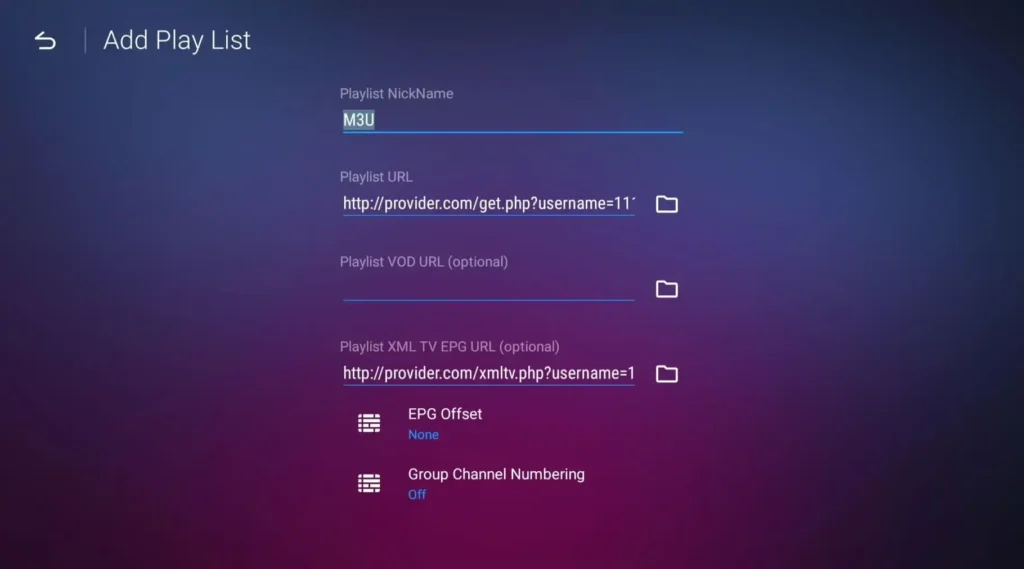
Depuis l’écran d’accueil de MYTVOnline, sélectionnez « Ajouter un portail ».
Vous verrez les champs pour le pseudo du portail, l’URL du portail, le nom d’utilisateur et le mot de passe.
Étape 3 : Saisissez les détails de l’API Xtream Codes
Surnom du portail : saisissez un nom pour le portail (par exemple “FaarTV”).
URL du portail : saisissez l’URL de votre API Xtream Codes.
Nom d’utilisateur et mot de passe : saisissez le nom d’utilisateur et le mot de passe fournis par FaarTV.
Étape 4 : Connecter et charger les chaînes
Après avoir saisi tous les détails, cliquez sur « Connecter » ou « OK ».
MYTVOnline se connecte au serveur IPTV via l’API Xtream Codes. Si l’opération est terminée avec succès, vos chaînes, VOD, séries et EPG seront chargés.
Étape 5 : Accédez au contenu IPTV
Une fois connecté, différentes catégories s’afficheront, notamment la télévision en direct, les films (VOD), les séries et parfois la télévision de rattrapage.
Parcourez les catégories pour accéder et profiter de votre contenu IPTV.

NVIDIA Shield TV
TiviMate
1. Install TiviMate:
– Open the Google Play Store on your NVIDIA Shield.
– Search for “TiviMate” in the store and select the TiviMate TV Player app.
– Click “Install” to download and install TiviMate.
2. Open TiviMate and set up your playlist:
– Launch TiviMate after installation.
– When opened, you will be asked to add a playlist. This is where you enter your FaarTV playlist.
– Select “Add Playlist” and then “Enter URL”.
– Enter your FaarTV M3U URL.
– Click “Next” to allow TiviMate to fetch your playlist data.
IPTVSmarters Pro
1. Install an IPTV app:
The most popular apps for IPTV streaming on Nvidia Shield are IPTV Smarters Pro and TiviMate, both available on Google Play Store.
Step 1: Turn on your Nvidia Shield and navigate to Google Play Store.
Step 2: Search for IPTV Smarters Pro.
Step 3: Select the app and choose “Install”.
2. Open and set up the IPTV app:
Once installed, configure the app with your IPTV provider’s credentials.
Step 1: Open the IPTV app on your Nvidia Shield.
Step 2: You will be asked to accept the app’s terms and conditions.
Step 3: Select “Add new user”. You may need one of the following to log in:
M3U playlist URL provided by your IPTV service provider.
Xtream Codes API credentials, which usually include a username, password and server URL.
3. Configure your IPTV playlist
Step 1: Enter the M3U URL or Xtream Codes API information into the app according to the instructions of your IPTV provider.
Step 2: Select “Load channels”. The app will load your IPTV channels, VOD content and series from the server.

Dreambox
E2iPlayer
Update package list:
First, make sure your package list is up to date by running:
opkg update
Check for the E2iPlayer package:
To confirm that E2iPlayer is available in your package repository, search for it using the following command:
opkg list | grep e2iplayer
This command will filter the list of packages to show only those related to e2iplayer.
Install E2iPlayer:
Once you have confirmed that enigma2 plugin extensions e2iplayer is available, install it by running:
opkg install enigma2-plugin-extensions-e2iplayer
Verify installation:
To verify that E2iPlayer was installed successfully, you can run:
opkg list_installed | grep e2iplayer
This command will list the installed packages and confirm if enigma2 plugin extensions e2iplayer is present.
Restart Enigma2 device:
After the installation is complete, it is recommended to restart your Enigma2 device to ensure the plugin is loaded correctly.
Access E2iPlayer:
After rebooting the device, you should find E2iPlayer in the Plugins menu. Open it to configure and use IPTV streams.
XStreamity Plugin
Step 1: Install the XStreamity Plugin
– Download the xstreamity_4.61.ipk file to your computer by clicking on the link provided: https://drive.faartv.com/xstreamity_4.61.ipk
– Connect to your Enigma2 device using an FTP client such as FileZilla.
– Use the IP address of your device and log in using the default credentials (username is usually root, and there may or may not be a password).
– Transfer the downloaded .ipk file to the /tmp directory on your Enigma2 device.
– Access the terminal on your Enigma2 device. You can do this using an SSH or Telnet client such as PuTTY.
– Connect to your device using the IP address and log in using the same credentials as you would use for FTP.
“opkg install /tmp/xstreamity_4.61.ipk”
– Wait until the installation is complete.
Step 2: Open XStreamity and add your IPTV subscription

– Go to “Plugins” in the main menu and select “XStreamity”.
– Open XStreamity and go to “Add Playlist”.
– You will need the username, password and server URL you received from your IPTV service.
– Enter each detail in the corresponding field in XStreamity.
Step 3: Load and customize your playlist
– After entering the details, XStreamity will load the IPTV playlist.
– You will see different categories like “Live TV”, “Movies”, “Series” and “Catch up”.
– Go to the settings section in XStreamity and enter the EPG URL.
Step 4: Access IPTV content
– Once your playlist is set up, navigate through the categories and start streaming Live TV, Movies or Series.
– VOD content like Movies and Series can be accessed separately in the XStreamity menu.
XtreamTV Plugin
Step 1: Download and extract XtreamTV plugin
Download the XtreamTV ZIP file from the link provided: https://drive.FaarTV.com/XtreamTV.zip
Extract the contents of the ZIP file on your computer. Inside you should find a DEB file which is the installation package for the XtreamTV plugin.
Step 2: Connect to your Enigma2 device
Find the IP address of your Enigma2 device by going to Menu > Information > Network on the device.
Connect via FTP: Use an FTP client (e.g. FileZilla) and enter the device’s IP address, username (usually root) and password (if any) to log in.
Step 3: Transfer the XtreamTV DEB file to your Enigma2 device
In your FTP client, navigate to the /tmp directory on your Enigma2 device.
Upload the extracted DEB file from your computer to the /tmp directory.
Step 4: Install the XtreamTV plugin using Telnet or SSH
Open a terminal or use an SSH client (e.g. PuTTY) to connect to your Enigma2 device. Use the IP address, root username and password (if set).
Run the following command to install the XtreamTV plugin:
dpkg –force-all -i /tmp/XtreamTV_0.2.3_oe26_aarch64.deb
Wait for the installation to complete. This command will install the XtreamTV plugin and force the installation to overwrite any conflicting files if necessary.
Step 5: Configure the XtreamTV plugin
After installation, reboot your Enigma2 device to ensure the plugin is fully activated.
After rebooting, open the XtreamTV plugin from the plugin menu on your Enigma2 device.
A plugin ID (MAC address) will be displayed on the screen. Make a note of this ID as it is needed for IPTV activation.
Step 6: Register the plugin ID with FaarTV
Provide the plugin ID to FaarTV support so they can activate your subscription.
Step 7: Access IPTV channels
Once FaarTV has confirmed activation, reboot your device if necessary.
Open XtreamTV again and you should see the IPTV channels and VOD options according to your subscription.
Stalker Plugin
Step 1: Download the Stalker Plugin file
Download the Stalker.ipk file from the link provided: https://drive.faartv.com/Stalker.ipk
Save the file to your computer for easy access.
Step 2: Transfer the Stalker Plugin to your Enigma2 device
Connect to Enigma2 via FTP:
Use an FTP client such as FileZilla and enter the IP address, username (usually root) and password (if any) of your Enigma2 device.
Browse to the /tmp directory:
On the Enigma2 device, go to the /tmp directory.
Upload Stalker.ipk:
Transfer the Stalker.ipk file from your computer to the /tmp folder on your Enigma2 device.
Step 3: Install the Stalker Plugin using Telnet or SSH
Open a terminal or SSH client:
Use a terminal or Telnet/SSH client (like PuTTY) to connect to your Enigma2 device.
Install the plugin:
Run the following command to install the .ipk file:
opkg install /tmp/Stalker.ipk
Wait for the installation: The Stalker plugin will be installed on your Enigma2 device.
Step 4: Restart the device
After the installation is complete, reboot your Enigma2 device:
Restart
Step 5: Configure the Stalker plugin
Open the Stalker plugin:
After the device reboots, navigate to Plugins and select Stalker.
Enter portal information:
You need to enter the portal URL provided by FaarTV. This URL is required to connect to the IPTV server.
Also, enter any usernames and passwords provided by FaarTV if required.
Step 6: Save and connect
After entering the portal information, save the settings.
The Stalker plugin should now connect to the IPTV portal, allowing you to access live TV channels, VOD and other IPTV features depending on your subscription.
Step 7: Test the connection
Go back to the Stalker main screen and test if the channels have loaded successfully.
If everything is set up correctly, you should now have access to your IPTV content.
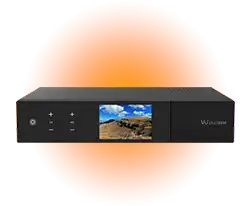
VU+
E2iPlayer
Update package list:
First, make sure your package list is up to date by running:
opkg update
Check for the E2iPlayer package:
To confirm that E2iPlayer is available in your package repository, search for it using the following command:
opkg list | grep e2iplayer
This command will filter the list of packages to show only those related to e2iplayer.
Install E2iPlayer:
Once you have confirmed that enigma2 plugin extensions e2iplayer is available, install it by running:
opkg install enigma2-plugin-extensions-e2iplayer
Verify installation:
To verify that E2iPlayer was installed successfully, you can run:
opkg list_installed | grep e2iplayer
This command will list the installed packages and confirm if enigma2 plugin extensions e2iplayer is present.
Restart Enigma2 device:
After the installation is complete, it is recommended to restart your Enigma2 device to ensure the plugin is loaded correctly.
Access E2iPlayer:
After rebooting the device, you should find E2iPlayer in the Plugins menu. Open it to configure and use IPTV streams.
XStreamity Plugin
Step 1: Install the XStreamity Plugin
– Download the xstreamity_4.61.ipk file to your computer by clicking on the link provided: https://drive.faartv.com/xstreamity_4.61.ipk
– Connect to your Enigma2 device using an FTP client such as FileZilla.
– Use the IP address of your device and log in using the default credentials (username is usually root, and there may or may not be a password).
– Transfer the downloaded .ipk file to the /tmp directory on your Enigma2 device.
– Access the terminal on your Enigma2 device. You can do this using an SSH or Telnet client such as PuTTY.
– Connect to your device using the IP address and log in using the same credentials as you would use for FTP.
“opkg install /tmp/xstreamity_4.61.ipk”
– Wait until the installation is complete.
Step 2: Open XStreamity and add your IPTV subscription

– Go to “Plugins” in the main menu and select “XStreamity”.
– Open XStreamity and go to “Add Playlist”.
– You will need the username, password and server URL you received from your IPTV service.
– Enter each detail in the corresponding field in XStreamity.
Step 3: Load and customize your playlist
– After entering the details, XStreamity will load the IPTV playlist.
– You will see different categories like “Live TV”, “Movies”, “Series” and “Catch up”.
– Go to the settings section in XStreamity and enter the EPG URL.
Step 4: Access IPTV content
– Once your playlist is set up, navigate through the categories and start streaming Live TV, Movies or Series.
– VOD content like Movies and Series can be accessed separately in the XStreamity menu.
XtreamTV Plugin
Step 1: Download and extract XtreamTV plugin
Download the XtreamTV ZIP file from the link provided: https://drive.FaarTV.com/XtreamTV.zip
Extract the contents of the ZIP file on your computer. Inside you should find a DEB file which is the installation package for the XtreamTV plugin.
Step 2: Connect to your Enigma2 device
Find the IP address of your Enigma2 device by going to Menu > Information > Network on the device.
Connect via FTP: Use an FTP client (e.g. FileZilla) and enter the device’s IP address, username (usually root) and password (if any) to log in.
Step 3: Transfer the XtreamTV DEB file to your Enigma2 device
In your FTP client, navigate to the /tmp directory on your Enigma2 device.
Upload the extracted DEB file from your computer to the /tmp directory.
Step 4: Install the XtreamTV plugin using Telnet or SSH
Open a terminal or use an SSH client (e.g. PuTTY) to connect to your Enigma2 device. Use the IP address, root username and password (if set).
Run the following command to install the XtreamTV plugin:
dpkg –force-all -i /tmp/XtreamTV_0.2.3_oe26_aarch64.deb
Wait for the installation to complete. This command will install the XtreamTV plugin and force the installation to overwrite any conflicting files if necessary.
Step 5: Configure the XtreamTV plugin
After installation, reboot your Enigma2 device to ensure the plugin is fully activated.
After rebooting, open the XtreamTV plugin from the plugin menu on your Enigma2 device.
A plugin ID (MAC address) will be displayed on the screen. Make a note of this ID as it is needed for IPTV activation.
Step 6: Register the plugin ID with FaarTV
Provide the plugin ID to FaarTV support so they can activate your subscription.
Step 7: Access IPTV channels
Once FaarTV has confirmed activation, reboot your device if necessary.
Open XtreamTV again and you should see the IPTV channels and VOD options according to your subscription.
Stalker Plugin
Step 1: Download the Stalker Plugin file
Download the Stalker.ipk file from the link provided: https://drive.faartv.com/Stalker.ipk
Save the file to your computer for easy access.
Step 2: Transfer the Stalker Plugin to your Enigma2 device
Connect to Enigma2 via FTP:
Use an FTP client such as FileZilla and enter the IP address, username (usually root) and password (if any) of your Enigma2 device.
Browse to the /tmp directory:
On the Enigma2 device, go to the /tmp directory.
Upload Stalker.ipk:
Transfer the Stalker.ipk file from your computer to the /tmp folder on your Enigma2 device.
Step 3: Install the Stalker Plugin using Telnet or SSH
Open a terminal or SSH client:
Use a terminal or Telnet/SSH client (like PuTTY) to connect to your Enigma2 device.
Install the plugin:
Run the following command to install the .ipk file:
opkg install /tmp/Stalker.ipk
Wait for the installation: The Stalker plugin will be installed on your Enigma2 device.
Step 4: Restart the device
After the installation is complete, reboot your Enigma2 device:
Restart
Step 5: Configure the Stalker plugin
Open the Stalker plugin:
After the device reboots, navigate to Plugins and select Stalker.
Enter portal information:
You need to enter the portal URL provided by FaarTV. This URL is required to connect to the IPTV server.
Also, enter any usernames and passwords provided by FaarTV if required.
Step 6: Save and connect
After entering the portal information, save the settings.
The Stalker plugin should now connect to the IPTV portal, allowing you to access live TV channels, VOD and other IPTV features depending on your subscription.
Step 7: Test the connection
Go back to the Stalker main screen and test if the channels have loaded successfully.
If everything is set up correctly, you should now have access to your IPTV content.

Strong LEAP S1
TiviMate
– On your Strong LEAP S1, go to the home screen and click on Apps.
– Open the Google Play Store and click on the search icon.
– Type TiviMate in the search bar and find the app.
– Select the app from the suggested result.
– Click Install to install the app on your Strong LEAP S1.
– Once the app is installed, click Open to launch the app.
– Launch the TiviMate app on your Strong LEAP S1.
Hot Player
– Turn on your Strong LEAP S1 and make sure it is connected to WiFi.
– Open the Google Play Store.
– Type “HotPlayer” in the search bar.
– Select the app and click “Install”.
– After installation, open “HotPlayer” from your app list.
– Go to the app settings and find your MAC address.
– Send the MAC address to the FaarTV team via Whatsapp or Telegram or support email.
IBO Player Pro
– On your Strong LEAP S1, go to the home screen and click on Apps
– Open Google Play Store and click on the search icon.
– Type iboPlayer PRO in the search bar and find the app.
– Select the app from the suggested result.
– Click Install to install the app on your Strong LEAP S1.
– Once the app is installed, click Open to launch the app.
– Launch the IboPlayer PRO app on your Strong LEAP S1 to get the Device ID and Key.
– Send your Device ID and Key to us.
IBO Player
– On your Strong LEAP S1, go to the home screen and click on Apps
– Open Google Play Store and click on the search icon.
– Type IBO Player in the search bar and find the app.
– Select the app from the suggested result.
– Click Install to install the app on your Strong LEAP S1.
– Once the app is installed, click Open to launch the app.
– Launch the IBO Player app on your Strong LEAP S1 to get the Device ID and Key.
– Send your Device ID and Key to us.
IPTVSmarters Pro
– On your Strong LEAP S1, go to the home screen and click on Apps
– Open the Google Play Store and click on the search icon.
– Type IPTVSMARTERS PRO in the search bar and find the app.
– Select the app from the suggested result.
– Click Install to install the app on your Strong LEAP S1.
– Once the app is installed, click Open to launch the app.
– Launch the IPTVSMARTERS PRO app on your Strong LEAP S1.
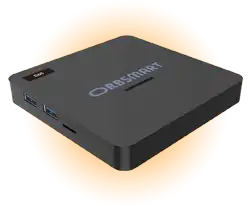
Orbsmart S86
TiviMate
– On your Orbsmart S86, go to the home screen and click on Apps.
– Open the Google Play Store and click on the search icon.
– Type TiviMate in the search bar and find the app.
– Select the app from the suggested result.
– Click Install to install the app on your Orbsmart S86.
– Once the app is installed, click Open to launch the app.
– Launch the TiviMate app on your Orbsmart S86.
Hot Player
– Turn on your Orbsmart S86 and make sure it is connected to WiFi.
– Open the Google Play Store.
– Type “HotPlayer” in the search bar.
– Select the app and click “Install”.
– After installation, open “HotPlayer” from your app list.
– Go to the app settings and find your MAC address.
– Send the MAC address to the FaarTV team via Whatsapp or Telegram or support email.
IBO Player Pro
– On your Orbsmart S86, go to the home screen and click on Apps
– Open Google Play Store and click on the search icon.
– Type IboPlayer PRO in the search bar and find the app.
– Select the app from the suggested result.
– Click Install to install the app on your Orbsmart S86.
– Once the app is installed, click Open to launch the app.
– Launch the iboPlayer PRO app on your Orbsmart S86 to get the Device ID and Key.
– Send your Device ID and Key to us.
IBO Player
– On your Orbsmart S86, go to the home screen and click on Apps
– Open Google Play Store and click on the search icon.
– Type IBO Player in the search bar and find the app.
– Select the app from the suggested result.
– Click Install to install the app on your Orbsmart S86.
– Once the app is installed, click Open to launch the app.
– Launch the IBO Player app on your Orbsmart S86 to get the Device ID and Key.
– Send your Device ID and Key to us.
IPTVSmarters Pro
– On your Orbsmart S86, go to the home screen and click on Apps
– Open the Google Play Store and click on the search icon.
– Type IPTVSMARTERS PRO in the search bar and find the app.
– Select the app from the suggested result.
– Click Install to install the app on your Orbsmart S86.
– Once the app is installed, click Open to launch the app.
– Launch the IPTVSMARTERS PRO app on your Orbsmart S86.
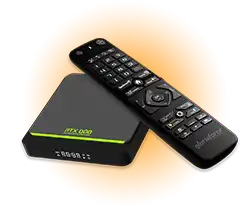
GloriaForce RTX Duo
TiviMate
– On your GloriaForce, go to the home screen and click on Apps.
– Open the Google Play Store and click on the search icon.
– Type TiviMate in the search bar and find the app.
– Select the app from the suggested result.
– Click Install to install the app on your GloriaForce.
– Once the app is installed, click Open to launch the app.
– Launch the TiviMate app on your GloriaForce.
Hot Player
– Turn on your GloriaForce and make sure it is connected to WiFi.
– Open the Google Play Store.
– In the search bar, type “HotPlayer”.
– Select the app and click “Install”.
– After installation, open “HotPlayer” from your app list.
– Go to the app settings and find your MAC address.
– Send the MAC address to the FaarTV team via Whatsapp or Telegram or support email.
IBO Player Pro
– On your GloriaForce, go to the home screen and click on Apps
– Open Google Play Store and click on the search icon.
– Type IboPlayer PRO in the search bar and find the app.
– Select the app from the suggested result.
– Click Install to install the app on your GloriaForce.
– Once the app is installed, click Open to launch the app.
– Launch the iboPlayer PRO app on your GloriaForce to get the Device ID and Key.
– Send your Device ID and Key to us.
IBO Player
– On your GloriaForce, go to the home screen and click on Apps
– Open Google Play Store and click on the search icon.
– Type IBO Player in the search bar and find the app.
– Select the app from the suggested result.
– Click Install to install the app on your GloriaForce.
– Once the app is installed, click Open to launch the app.
– Launch the IBO Player app on your GloriaForce to get the Device ID and Key.
– Send your Device ID and Key to us.
IPTVSmarters Pro
– On your GloriaForce, go to the home screen and click on Apps
– Open the Google Play Store and click on the search icon.
– Type IPTVSMARTERS PRO in the search bar and find the app.
– Select the app from the suggested result.
– Click Install to install the app on your GloriaForce.
– Once the app is installed, click Open to launch the app.
– Launch the IPTVSMARTERS PRO app on your GloriaForce.
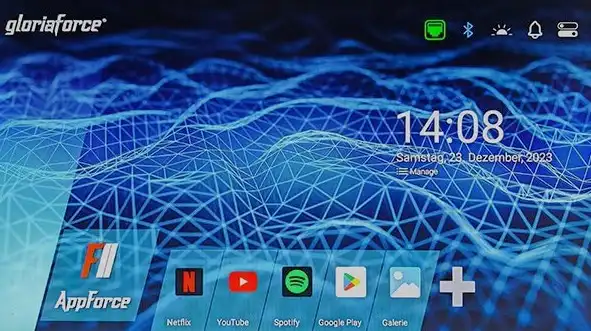
AppForce 2
Open AppForce:
Start your GloriaForce device and open the AppForce application.
Access IPTV Settings:
– Navigate to the Settings menu in AppForce.
– Look for the “Server URL” or “Xtream Codes API” option (Username, Password, URL).
Enter your Xtream Codes information:
– URL: Enter the server URL provided by FaarTV. This URL is often in the format http://FaarTV .com:8080
– Username: Enter your FaarTV username provided in your subscription details.
– Password: Enter the corresponding password associated with your FaarTV account.
Save and Sync:
– Once you have entered all the details, select “Add” or “Save” to save the information.
– Use the “Sync to Server” option to retrieve your channel list and other IPTV content.
Test the connection:
– Go back to the main menu and check categories like Live TV, Movies and Series to see if the channels are loading properly.
– You should now have access to FaarTV content via AppForce.
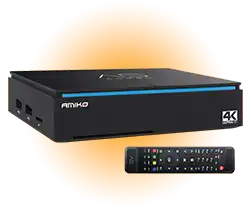
Amiko A5
TiviMate
– On your Amiko A5, go to the home screen and click on Apps.
– Open the Google Play Store and click on the search icon.
– Type TiviMate in the search bar and find the app.
– Select the app from the suggested result.
– Click Install to install the app on your Amiko A5.
– Once the app is installed, click Open to launch the app.
– Launch the TiviMate app on your Amiko A5.
Hot Player
– Turn on your Amiko A5 and make sure it is connected to WiFi.
– Open the Google Play Store.
– Type “HotPlayer” in the search bar.
– Select the app and click “Install”.
– After installation, open “HotPlayer” from your app list.
– Go to the app settings and find your MAC address.
– Send the MAC address to the FaarTV team via Whatsapp or Telegram or support email.
IBO Player Pro
– On your Amiko A5, go to the home screen and click on Apps
– Open Google Play Store and click on the search icon.
– Type IboPlayer PRO in the search bar and find the app.
– Select the app from the suggested result.
– Click Install to install the app on your Amiko A5.
– Once the app is installed, click Open to launch the app.
– Launch the IboPlayer PRO app on your Amiko A5 to get the Device ID and Key.
– Send your Device ID and Key to us.
IBO Player
– On your Amiko A5, go to the home screen and click on Apps
– Open Google Play Store and click on the search icon.
– Type IBO Player in the search bar and find the app.
– Select the app from the suggested result.
– Click Install to install the app on your Amiko A5.
– Once the app is installed, click Open to launch the app.
– Launch the IBO Player app on your Amiko A5 to get the device ID and key.
– Send your device ID and key to us.
IPTVSmarters Pro
– On your Amiko A5, go to the home screen and click on Apps
– Open the Google Play Store and click on the search icon.
– Type IPTVSMARTERS PRO in the search bar and find the app.
– Select the app from the suggested result.
– Click Install to install the app on your Amiko A5.
– Once the app is installed, click Open to launch the app.
– Launch the IPTVSMARTERS PRO app on your Amiko A5.
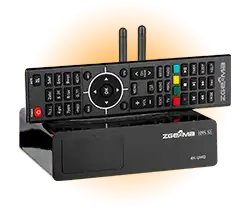
Zegemma H9s
E2iPlayer
Update package list:
First, make sure your package list is up to date by running:
opkg update
Check for the E2iPlayer package:
To confirm that E2iPlayer is available in your package repository, search for it using the following command:
opkg list | grep e2iplayer
This command will filter the list of packages to show only those related to e2iplayer.
Install E2iPlayer:
Once you have confirmed that enigma2 plugin extensions e2iplayer is available, install it by running:
opkg install enigma2-plugin-extensions-e2iplayer
Verify installation:
To verify that E2iPlayer was installed successfully, you can run:
opkg list_installed | grep e2iplayer
This command will list the installed packages and confirm if enigma2 plugin extensions e2iplayer is present.
Restart Enigma2 device:
After the installation is complete, it is recommended to restart your Enigma2 device to ensure the plugin is loaded correctly.
Access E2iPlayer:
After rebooting the device, you should find E2iPlayer in the Plugins menu. Open it to configure and use IPTV streams.
XStreamity Plugin
Step 1: Install the XStreamity Plugin
– Download the xstreamity_4.61.ipk file to your computer by clicking on the link provided: https://drive.faartv.com/xstreamity_4.61.ipk
– Connect to your Enigma2 device using an FTP client such as FileZilla.
– Use the IP address of your device and log in using the default credentials (username is usually root, and there may or may not be a password).
– Transfer the downloaded .ipk file to the /tmp directory on your Enigma2 device.
– Access the terminal on your Enigma2 device. You can do this using an SSH or Telnet client such as PuTTY.
– Connect to your device using the IP address and log in using the same credentials as you would use for FTP.
“opkg install /tmp/xstreamity_4.61.ipk”
– Wait until the installation is complete.
Step 2: Open XStreamity and add your IPTV subscription

– Go to “Plugins” in the main menu and select “XStreamity”.
– Open XStreamity and go to “Add Playlist”.
– You will need the username, password and server URL you received from your IPTV service.
– Enter each detail in the corresponding field in XStreamity.
Step 3: Load and customize your playlist
– After entering the details, XStreamity will load the IPTV playlist.
– You will see different categories like “Live TV”, “Movies”, “Series” and “Catch up”.
– Go to the settings section in XStreamity and enter the EPG URL.
Step 4: Access IPTV content
– Once your playlist is set up, navigate through the categories and start streaming Live TV, Movies or Series.
– VOD content like Movies and Series can be accessed separately in the XStreamity menu.
XtreamTV Plugin
Step 1: Download and extract XtreamTV plugin
Download the XtreamTV ZIP file from the link provided: https://drive.faartv.com/XtreamTV.zip
Extract the contents of the ZIP file on your computer. Inside you should find a DEB file which is the installation package for the XtreamTV plugin.
Step 2: Connect to your Enigma2 device
Find the IP address of your Enigma2 device by going to Menu > Information > Network on the device.
Connect via FTP: Use an FTP client (e.g. FileZilla) and enter the device’s IP address, username (usually root) and password (if any) to log in.
Step 3: Transfer the XtreamTV DEB file to your Enigma2 device
In your FTP client, navigate to the /tmp directory on your Enigma2 device.
Upload the extracted DEB file from your computer to the /tmp directory.
Step 4: Install the XtreamTV plugin using Telnet or SSH
Open a terminal or use an SSH client (e.g. PuTTY) to connect to your Enigma2 device. Use the IP address, root username and password (if set).
Run the following command to install the XtreamTV plugin:
dpkg –force-all -i /tmp/XtreamTV_0.2.3_oe26_aarch64.deb
Wait for the installation to complete. This command will install the XtreamTV plugin and force the installation to overwrite any conflicting files if necessary.
Step 5: Configure the XtreamTV plugin
After installation, reboot your Enigma2 device to ensure the plugin is fully activated.
After rebooting, open the XtreamTV plugin from the plugin menu on your Enigma2 device.
A plugin ID (MAC address) will be displayed on the screen. Make a note of this ID as it is needed for IPTV activation.
Step 6: Register the plugin ID with FaarTV
Provide the plugin ID to FaarTV support so they can activate your subscription.
Step 7: Access IPTV channels
Once FaarTV has confirmed activation, reboot your device if necessary.
Open XtreamTV again and you should see the IPTV channels and VOD options according to your subscription.
Stalker Plugin
Step 1: Download the Stalker Plugin file
Download the Stalker.ipk file from the link provided: https://drive.faartv.com/Stalker.ipk
Save the file to your computer for easy access.
Step 2: Transfer the Stalker Plugin to your Enigma2 device
Connect to Enigma2 via FTP:
Use an FTP client such as FileZilla and enter the IP address, username (usually root) and password (if any) of your Enigma2 device.
Browse to the /tmp directory:
On the Enigma2 device, go to the /tmp directory.
Upload Stalker.ipk:
Transfer the Stalker.ipk file from your computer to the /tmp folder on your Enigma2 device.
Step 3: Install the Stalker Plugin using Telnet or SSH
Open a terminal or SSH client:
Use a terminal or Telnet/SSH client (like PuTTY) to connect to your Enigma2 device.
Install the plugin:
Run the following command to install the .ipk file:
opkg install /tmp/Stalker.ipk
Wait for the installation: The Stalker plugin will be installed on your Enigma2 device.
Step 4: Restart the device
After the installation is complete, reboot your Enigma2 device:
Restart
Step 5: Configure the Stalker plugin
Open the Stalker plugin:
After the device reboots, navigate to Plugins and select Stalker.
Enter portal information:
You need to enter the portal URL provided by FaarTV. This URL is required to connect to the IPTV server.
Also, enter any usernames and passwords provided by FaarTV if required.
Step 6: Save and connect
After entering the portal information, save the settings.
The Stalker plugin should now connect to the IPTV portal, allowing you to access live TV channels, VOD and other IPTV features depending on your subscription.
Step 7: Test the connection
Go back to the Stalker main screen and test if the channels have loaded successfully.
If everything is set up correctly, you should now have access to your IPTV content.
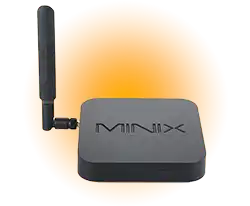
Minix Neo Neo
TiviMate
– On your Minix Neo Neo, go to the home screen and click on Apps.
– Open Google Play Store and click on the search icon.
– Type TiviMate in the search bar and find the app.
– Select the app from the suggested result.
– Click Install to install the app on your Minix Neo Neo.
– Once the app is installed, click Open to launch the app.
– Launch the TiviMate app on your Minix Neo Neo.
Hot Player
– Turn on your Minix Neo Neo and make sure it is connected to WiFi.
– Open Google Play Store.
– In the search bar, type “HotPlayer”.
– Select the app and click “Install”.
– After installation, open “HotPlayer” from your app list.
– Go to the app settings and find your MAC address.
– Send the MAC address to the FaarTV team via Whatsapp or Telegram or support email.
IBO Player Pro
– On your Minix Neo Neo, go to the home screen and click on Apps
– Open Google Play Store and click on the search icon.
– Type IboPlayer PRO in the search bar and find the app.
– Select the app from the suggested result.
– Click Install to install the app on your Minix Neo Neo.
– Once the app is installed, click Open to launch the app.
– Launch the IboPlayer PRO app on your Minix Neo Neo to get the Device ID and Key.
– Send your Device ID and Key to us.
IBO Player
– On your Minix Neo Neo, go to the home screen and click on Apps
– Open Google Play Store and click on the search icon.
– Type IBO Player in the search bar and find the app.
– Select the app from the suggested result.
– Click Install to install the app on your Minix Neo Neo.
– Once the app is installed, click Open to launch the app.
– Launch the IBO Player app on your Minix Neo Neo to get the Device ID and Key.
– Send your Device ID and Key to us.
IPTVSmarters Pro
– On your Minix Neo Neo, go to the home screen and click on Apps
– Open the Google Play Store and click on the search icon.
– Type IPTVSMARTERS PRO in the search bar and find the app.
– Select the app from the suggested result.
– Click Install to install the app on your Minix Neo Neo.
– Once the app is installed, click Open to launch the app.
– Launch the IPTVSMARTERS PRO app on your Minix Neo Neo.
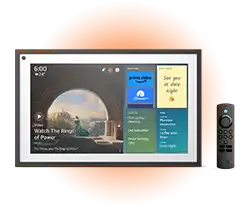
Alexa Echo Show
TiviMate
Install the Downloader app:
On your Echo Show 15, navigate to the Amazon Appstore.
Search for “Downloader” and install it.
Configure the Downloader:
Open the Downloader app.
Give the required permissions when prompted.
In the app, go to “Settings” (bottom left).
Under “Download Folder”, change the destination from “Download” to “Downloader” and save the changes.
Disable the “Automatically install APK” option by unchecking it.
Download the IPTV APK:
In the Downloader app, select the “Browser” option.
Enter the code of the IPTV APK you want to install. For TiviMate, enter: 943714.
Download the APK file. After the download is complete, select “Done” instead of “Install”.
Install the X plore File Manager:
Return to the Amazon Appstore.
Search for “X plore File Manager” and install it.
Install the IPTV APK:
Open the X plore File Manager app.
Navigate to Internal Storage > Download to find the downloaded APK file.
Select the APK file.
A prompt will appear. Select “Continue” and then “Install” to proceed with the installation.
Launch the IPTV application:
After installation, the IPTV app will be available on your Echo Show 15.
You can launch it immediately or access it later via the Fire TV interface.
IBO Player Pro
Install the Downloader app:
On your Echo Show 15, navigate to the Amazon Appstore.
Search for “Downloader” and install it.
Configure the Downloader:
Open the Downloader app.
Give the required permissions when prompted.
In the app, go to “Settings” (bottom left).
Under “Download Folder”, change the destination from “Download” to “Downloader” and save the changes.
Disable the “Automatically install APK” option by unchecking it.
Download the IPTV APK:
In the Downloader app, select the “Browser” option.
Enter the code of the IPTV APK you want to install. for IBO Player Pro, enter: 947786 .
Download the APK file. After the download is complete, select “Done” instead of “Install”.
Install the X plore File Manager:
Return to the Amazon Appstore.
Search for “X plore File Manager” and install it.
Install the IPTV APK:
Open the X plore File Manager app.
Navigate to Internal Storage > Download to find the downloaded APK file.
Select the APK file.
A prompt will appear. Select “Continue” and then “Install” to proceed with the installation.
Launch the IPTV application:
After installation, the IPTV app will be available on your Echo Show 15.
You can launch it immediately or access it later via the Fire TV interface.
IBO Player
Install the Downloader app:
On your Echo Show 15, navigate to the Amazon Appstore.
Search for “Downloader” and install it.
Configure the Downloader:
Open the Downloader app.
Give the required permissions when prompted.
In the app, go to “Settings” (bottom left).
Under “Download Folder”, change the destination from “Download” to “Downloader” and save the changes.
Disable the “Automatically install APK” option by unchecking it.
Download the IPTV APK:
In the Downloader app, select the “Browser” option.
Enter the code of the IPTV APK you want to install. for IBO Player, enter: 532837 .
Download the APK file. After the download is complete, select “Done” instead of “Install”.
Install the X plore File Manager:
Return to the Amazon Appstore.
Search for “X plore File Manager” and install it.
Install the IPTV APK:
Open the X plore File Manager app.
Navigate to Internal Storage > Download to find the downloaded APK file.
Select the APK file.
A prompt will appear. Select “Continue” and then “Install” to proceed with the installation.
Launch the IPTV application:
After installation, the IPTV app will be available on your Echo Show 15.
You can launch it immediately or access it later via the Fire TV interface.
IPTVSmarters Pro
Install the Downloader app:
On your Echo Show 15, navigate to the Amazon Appstore.
Search for “Downloader” and install it.
Configure the Downloader:
Open the Downloader app.
Give the required permissions when prompted.
In the app, go to “Settings” (bottom left).
Under “Download Folder”, change the destination from “Download” to “Downloader” and save the changes.
Disable the “Automatically install APK” option by unchecking it.
Download the IPTV APK:
In the Downloader app, select the “Browser” option.
Enter the code of the IPTV APK you want to install. for IPTVSmarters Pro, enter: 820194 .
Download the APK file. After the download is complete, select “Done” instead of “Install”.
Install the X plore File Manager:
Return to the Amazon Appstore.
Search for “X plore File Manager” and install it.
Install the IPTV APK:
Open the X plore File Manager app.
Navigate to Internal Storage > Download to find the downloaded APK file.
Select the APK file.
A prompt will appear. Select “Continue” and then “Install” to proceed with the installation.
Launch the IPTV application:
After installation, the IPTV app will be available on your Echo Show 15.
You can launch it immediately or access it later via the Fire TV interface.

Mecool KM2
TiviMate
– Gehen Sie auf Ihrem Mecool KM2 zum Startbildschirm und klicken Sie auf Apps.
– Öffnen Sie den Google Play Store und klicken Sie auf das Suchsymbol.
– Geben Sie TiviMate in die Suchleiste ein und suchen Sie die App.
– Wählen Sie die App aus dem vorgeschlagenen Ergebnis aus.
– Klicken Sie auf Installieren, um die App auf Ihrem Mecool KM2 zu installieren.
– Sobald die App installiert ist, klicken Sie auf Öffnen, um die App zu starten.
– Starten Sie die TiviMate App auf Ihrem Mecool KM2.
Hot Player
– Turn on your Mecool KM2 and make sure it is connected to WiFi.
– Open Google Play Store.
– Type “HotPlayer” in the search bar.
– Select the app and click “Install”.
– After installation, open “HotPlayer” from your app list.
– Go to the app settings and find your MAC address.
– Send the MAC address to the FaarTV team via Whatsapp or Telegram or support email.
IBO Player Pro
– On your Mecool KM2, go to the home screen and click on Apps
– Open Google Play Store and click on the search icon.
– Type IboPlayer PRO in the search bar and find the app.
– Select the app from the suggested result.
– Click Install to install the app on your Mecool KM2.
– Once the app is installed, click Open to launch the app.
– Launch the IboPlayer PRO app on your Mecool KM2 to get the Device ID and Key.
– Send your Device ID and Key to us.
IBO Player
– On your Mecool KM2, go to the home screen and click on Apps
– Open Google Play Store and click on the search icon.
– Type IBO Player in the search bar and find the app.
– Select the app from the suggested result.
– Click Install to install the app on your Android TV.
– Once the app is installed, click Open to launch the app.
– Launch the IBO Player app on your Mecool KM2 to get the Device ID and Key.
– Send your Device ID and Key to us.
IPTVSmarters Pro
– On your Mecool KM2, go to the home screen and click on Apps
– Open the Google Play Store and click on the search icon.
– Type IPTVSMARTERS PRO in the search bar and find the app.
– Select the app from the suggested result.
– Click Install to install the app on your Mecool KM2.
– Once the app is installed, click Open to launch the app.
– Launch the IPTVSMARTERS PRO app on your Mecool KM2.
